


Now a days internet connectivity has become one of the things that we need the most. It would be really amazing if we can use our computer’s fast internet Connection and at the same time share with our friends. Sharing becomes difficult when using USB modem, especially when you want to connect to your smartphones, tablets and the likes. You can easily use your PC’s USB modem internet connection to create a WIFI Hotspot right from your PC and share with friends, colleagues, neighbours or share with your other devices. And again due to android phones, we are used to using WIfI hotspots. therefore , we can create a WIfI hotspot using our laptop or PC with this simple CMD trick. Today's article explains how to use Command prompt to create WIFI hotspot right from your PC. Now let's get started.
WIFI Hotspot Using Command Prompt
1. Launch or open your command prompt with administrator privileges. You can click on the start button on your windows and click on Command Prompt (Admin) to launch it.2. Now type "netsh wlan show drivers" or if you feel lazy of typing just copy and paste without the quotation marks and hit enter. This will show your PC’s WIFI drivers information as shown below.

3. Check if your driver supports Hosted network as shown below.

4. If your driver supports Hosted network then you are set and you can go ahead.
Now type "netsh wlan set hostednetwork mode=allow ssid=Hotspotname key=password "
without the quotation marks and hit enter on your keyboard as shown below.
Take note: Set Hotspotname to your preferred name
Set password to your preferred password you will remember
In this example i will be using: netsh wlan set hostednetwork mode=allow ssid=TechTricksExpert key=12345Pass

5.To start, type "netsh wlan start hostednetwork" without the quotation marks and hit enter.
Your WIFI hotspot will be started as shown below. Now you can connect any device.

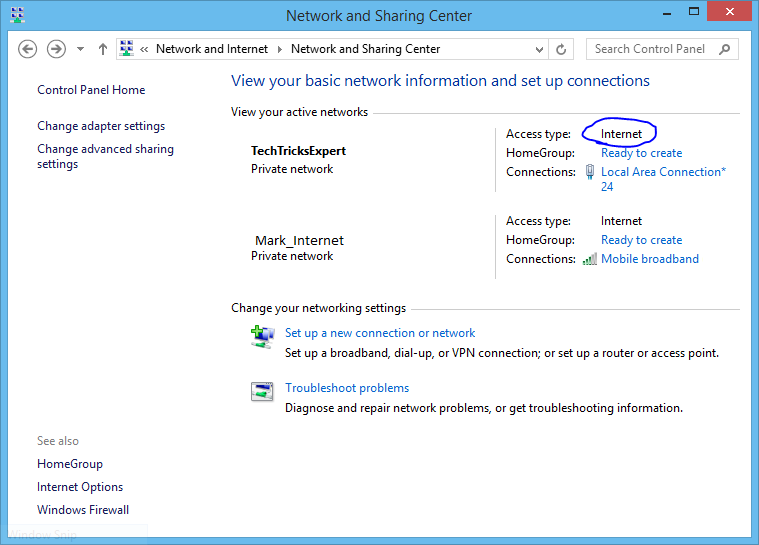
6. Now everything is set but wait, you will realize that there is no network access and how do you fix it. For this, click on the start button and click on Control Panel and again click on view network status and tasks as shown below.

7. Click on the name of your original network connection and over here mine is broadband and again click on properties as shown below.


8. Go to the Sharing tab and check the box of “Allow other network users to connect through this
computer’s internet connection”. Then select the adapter with which you want to share.
Here, i select Local Area Connection 24. Click Ok and we are done.

9. Now you will realize that the No Network Access has changed to Internet as shown below.
10. To stop the hosted network type "netsh wlan stop hostednetwork" without the quotation marks and hit enter on your keyboard.
Hope you enjoy.
2 comments
Write commentsThe use of wifi is so important in todays generation which is why i feel this blog will be read and shared many times as it is something super useful for everyone. Love how there is text and pictures, explaining everything
Replyits a great place for the historical & arts fan & give a real information, Thanks net worth
ReplyConversionConversion EmoticonEmoticon